The Peacock Room in Blue and White
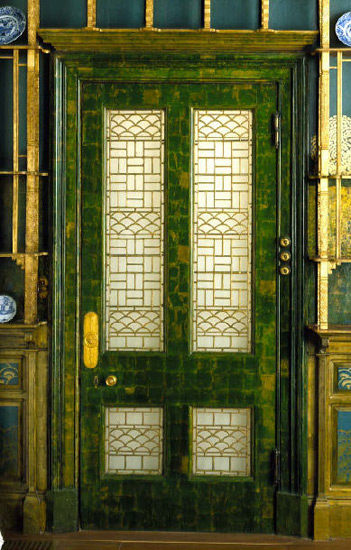
Frederick Leyland fully filled the shelves of the Peacock Room with his prized collection of blue-and-white Chinese porcelain. To recreate the room’s appearance today, ceramics from the Freer Gallery’s permanent collection—similar to Leyland’s Kangxi ware—are displayed on the north (fireplace) and east (shutters) walls. New pieces in the Kangxi style adorn the south (peacock mural) and west (doors) walls.
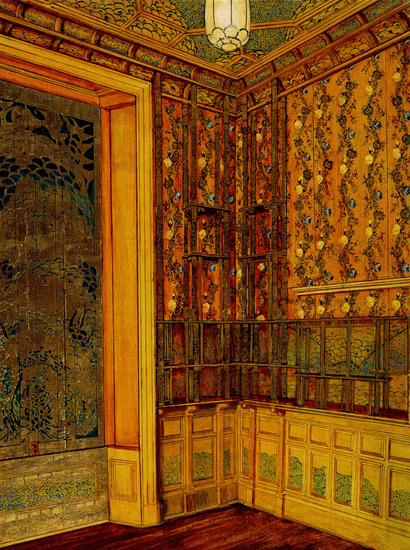
Leyland hired the gifted architect Thomas Jeckyll to redesign the dining room in his new home. Jeckyll incorporated gilded antique leather wall hangings and latticework shelving to showcase Leland's prized collection of Chinese blue-and-white porcelain.
Jeckyll and Leyland conceived of the room as a sort of neo-rococo exercise in chinoiserie. The long windows on the east side overlooked a private park, and the décor was meant to evoke a European notion of a Chinese garden pavilion.
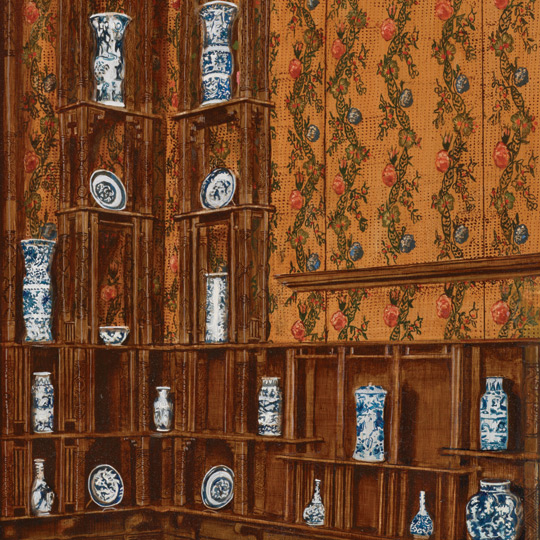

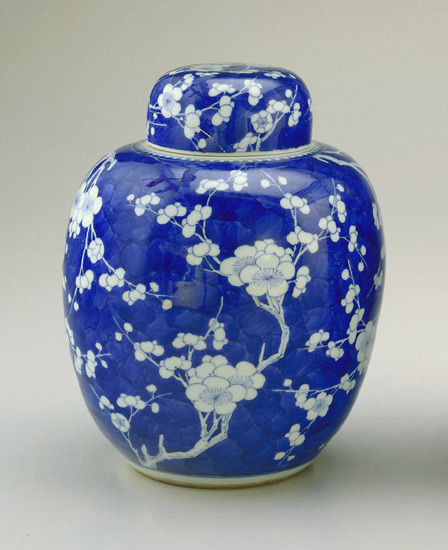
In Jeckyll's architectural scheme, each shelf was designed to hold a Chinese porcelain of standard shape and size: vertical niches along the top were for tall slender vases; square niches between the doors would hold large dishes; and eye-level shelves throughout the room would display brush pots, censers, and so-called hawthorn jars, much like the one shown here. Leyland's collection was dispersed at auction after his death in 1892.
In the summer of 1876, Jeckyll asked Whistler for advice on the color scheme of the doors to Leyland's dining room. (Whistler happened to be working on a relatively small project in the stair hall of Leyland's house.)
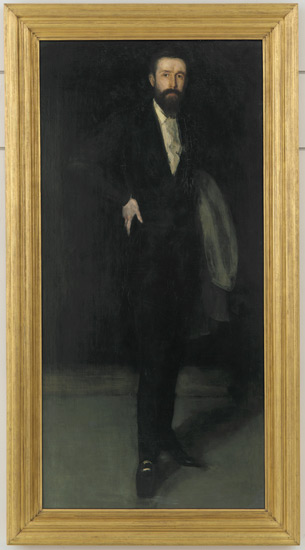
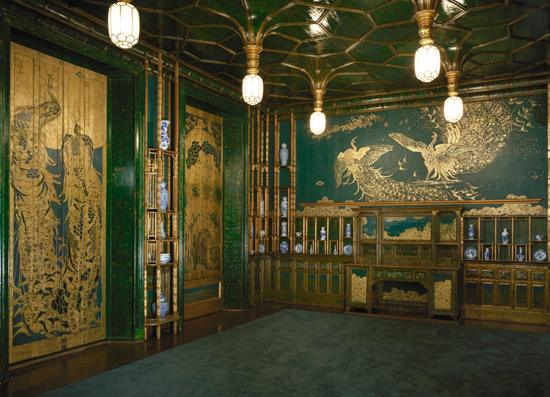
Inspired by the delicate patterns and vivid colors of the Chinese porcelains and the blue and gold motif of a peacock feather, Whistler commenced what became an extreme makeover of the room. He added a wave pattern on the cornice and woodwork, and he painted over the red flowers on the leather wall hangings. He felt they clashed with the delicate tonalities of his painting, La Princesse du pays de la porcelaine, which was hanging over the mantel. Leyland approved these changes and then left town on extended business.
Alone and unsupervised, Whistler let his imagination take flight. He covered the room, from the ceiling to the walls, with peacock patterns, and he painted monumental blue and gold peacocks on the shutters. Eventually Jeckyll's version of the room was transformed from a porcelain cabinet into a complete work of art. In his letters to Leyland, Whistler hinted about the "gorgeous surprise" awaiting his patron, but when Leyland returned to London, the change to his dining room was more than he had anticipated. The two men quarreled over the extent of Whistler's redecorations - and to Leyland's mind, the exorbitant fee attached to them.
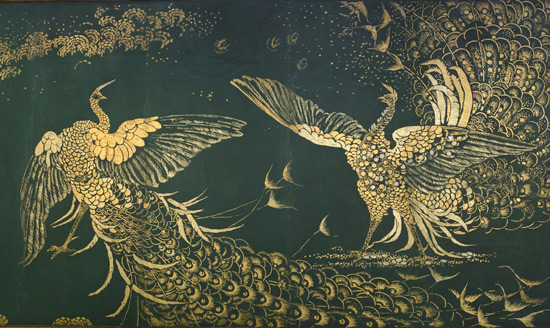
Hurt and angry, Whistler concluded his work with a vindictive allegorical mural of two battling peacocks pointedly titled "Art and Money: or, the Story of the Room." The artist is the poor peacock on the left. Its silver crest feather refers to Whistler's distinctive white forelock. Leyland, the rich but stingy patron, is the peacock on the right, glittering with coins.
In what he hoped would be the final verdict on the significance of the room and Leyland's place in it, Whistler wrote to his former friend and patron:
The World only knows you as the possessor of that work they have all admired and whose price you refused to pay… From a business point of view, money is all important. But for the artist, the work alone remains the fact. That it happened in the house of this one or that one is merely the anecdote — so that in some future dull Vasari — you will go down to posterity, like the man who paid Correggio in pennies!
Leyland ordered Whistler from his house, and the artist never saw the Peacock Room again. Despite his rage, Leyland clearly recognized something of value in Whistler's work, and he never changed a thing in the room. Until his death in 1892, Leyland continued to use the dining room and to display the collection of Kangxi blue-and-white porcelain on its shelves. He even allowed visitors to tour the notorious room. Critics occasionally wrote about it, thus keeping the "story of the room" alive into the next generation.

In 2019 a new effort began to recreate the display of blue-and-white porcelain Leyland preferred, but the Freer Gallery’s Kangxi ware collection was still not sufficient to fill the shelves as Leyland had done. To remedy this, museum curators began researching Leyland’s original collection in order to commission new pieces in the same style from a porcelain production center in Jingdezhen, China.
Because Leyland’s ceramics were dispersed after his death, period photographs and auction catalogues were key resources. Archival photographs revealed shapes and types of objects, but the patterns were illegible. It was known that Leyland acquired most of his collection from Murray Marks, and further research revealed that Marks was the preferred dealer for several wealthy Londoners, including a man named George Salting. Consulting the Salting bequest at the Victoria and Albert Museum, curators were able to discover what designs Leyland would have had access to through Marks. This bequest formed the basis of the reference images that were sent to the artists in Jingdezhen. The resulting installation provides a glimpse into James McNeill Whistler’s colorful vision of the Peacock Room.